
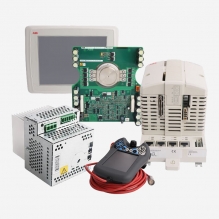


MP 3009X
Get A Quote


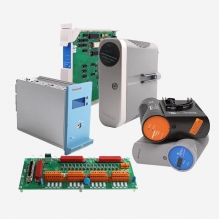
Industrial process control relies heavily on the stability of Input/Output components to maintain safe plant operations. The Honeywell Series C platform introduced a significant shift in hardware design by combining high-density signal processing with advanced thermal management, yet even robust systems face operational hurdles. Engineers and technicians tasked with maintaining the CC-PAIH01 51405038-175 High-Level Analog Input Module often encounter scenarios where distinguishing between a genuine hardware defect and a simple configuration error is difficult. This analysis breaks down the technical specifics required to diagnose issues accurately, ensuring your control system remains online and efficient.
Effective troubleshooting begins with a firm grasp of the Series C platform's design philosophy, which separates it from older rack-mounted I/O systems. Unlike previous generations where processing electronics sat far removed from field terminations, this architecture integrates these functions to reduce the physical footprint and improve signal integrity. This integration creates specific dependencies between the active module and its passive termination assembly that you must recognize during maintenance.
The analog input module acts as half of a complete system. It mechanically and electrically mates to an Input Output Termination Assembly (IOTA). This assembly houses passive components such as fuses, shunt resistors, and field terminals that condition raw field signals before they reach the module's electronics. Many faults attributed to the active CC-PAIH01 51405038-175 are actually failures of these IOTA components. A blown fuse on the 24V distribution rail, for example, will stop data flow just as effectively as a processor failure, yet it costs significantly less to fix. You must treat the module and the IOTA as a coupled unit during any fault analysis.
The tilted design of Series C modules serves a functional engineering purpose. This angle optimizes vertical airflow, allowing for higher channel density without requiring internal cooling fans. The module relies on ambient convection to dissipate heat. Clogged cabinet filters or ambient temperatures exceeding specifications can trigger thermal stress behaviors in the analog-to-digital converter. The CC-PCNT01 51405046-175 C300 Controller, which processes the data streams from these input modules, depends on this same thermal design to execute complex control strategies without overheating. If the cabinet airflow is compromised, you may see intermittent signal drift or communication errors long before a hard failure occurs.
Troubleshooting the Series C platform requires looking beyond the module itself. The physical environment and the condition of the termination assembly are often the root causes of what appears to be an electronic failure.
Visual indicators on the module faceplate provide the fastest method for a technician to assess the device state while standing at the cabinet. These specific blink sequences allow personnel to differentiate between internal hardware failures, field wiring issues, and configuration states without requiring immediate access to an engineering workstation. The diagnostic patterns are consistent across the platform, sharing similarities with the CC-PAOH01 51405039-175 Analog Output Module, although the implications change based on whether the device is sending or receiving signals.
| LED Color | Blink Pattern | Indicated Condition | Recommended Action |
| Green | Solid ON | Normal Operation | The module is powered, scanning, and communicating with the controller. No action is needed. |
| Red | Fast Blink | Loop Integrity Failure | This points to an open circuit or load resistance exceeding the drive limit (>700Ω). Verify field wiring continuity immediately. |
| Red | Slow Blink | Sensor "Near Death" | The sensor is electrically connected but exhibiting behavior that suggests imminent failure, such as signal drift or excessive noise. |
| Red | Solid ON | Catastrophic Failure | The module has failed a critical self-test involving RAM, ROM, or the ADC. You must replace the hardware. |
| Yellow | Solid ON | Diagnostic/Force Mode | The module is currently in a forced state or running internal "Sensor Check" diagnostics. |
Recognizing these codes prevents the unnecessary replacement of healthy hardware. A fast-blinking red LED almost always directs your attention to the field wiring or the transmitter, whereas a solid red light confirms the module itself has expired.
Installation errors frequently occur regarding voltage inputs because the module is not symmetrical across all channels. While the device handles 16 channels total, only the final four are engineered to support differential voltage inputs. These channels require a specific physical modification to the termination assembly to function correctly. Failing to perform this modification will result in measurement errors and potential hardware damage.
Voltage transmitters (0-10V) must connect exclusively to Channels 13, 14, 15, or 16. Channels 1 through 12 are designed primarily for current loops and lack the necessary circuitry to handle differential voltage measurement without external signal conditioning. Connecting a voltage source here will yield unpredictable results.
The termination assembly ships from the factory with precision 250-ohm resistors pre-installed for 4-20mA current loops. These resistors connect via a printed circuit board trace and a specific wire jumper located near the terminals.
Accurate voltage measurement requires high impedance. You must physically cut the wire jumper on the specific channel being used for voltage. This action removes the 250-ohm resistor from the circuit. If you skip this step, the voltage transmitter will attempt to drive current into the resistor, likely causing the transmitter to overheat or burn out the trace on the board.
This physical modification is permanent. Planning is vital before commissioning these channels for voltage applications, as reversing the change involves soldering or replacing the entire IOTA.
Power delivery issues often masquerade as complex module failures. The Series C system typically utilizes a robust CC-PWRR01 Redundant Power System to ensure a stable 24VDC supply to the backplane. Yet, local distribution faults at the termination level can still disrupt individual modules or channels, leading to confusion during troubleshooting.
Operators may see a "Field Power Failure" message on their console. This diagnostic does not mean the internal electronics of the input module have failed. Instead, it indicates that the voltage at the field terminals is absent. In the vast majority of cases, a blown glass fuse on the termination assembly causes this loss. The module electronics verify the presence of this voltage to ensure they can drive the loop. Replacing the fuse restores the circuit, and the module will automatically clear the error message once it detects voltage again.
The module features 1500 VAC channel-to-channel isolation. This "islands" each signal, preventing a surge on one wire from destroying the entire bank of inputs. Improper grounding of cable shields can create ground loops that bypass this protection. Current flowing through the shield can introduce noise that interferes with the precision measurements sent to the control system. Shields must be grounded at one end only, typically at the cabinet side. Verifying the stability of the power supply feeding the rack is also prudent, as voltage sags can cause intermittent reboots or communication drops that mimic hardware faults.
The distinction between a module failure and a power distribution failure saves time and spare parts. Always check the fuse and terminal voltage before condemning the electronic module.
The Experion PKS system categorizes faults into "Hard Fails" and "Soft Fails" to help operators prioritize their response. A Hard Fail indicates a dead module requiring immediate replacement. A Soft Fail points to a field issue, a configuration mismatch, or an environmental anomaly that leaves the module operational but degraded.
The module actively monitors the loop current. If the signal falls below a set threshold (typically <1.2 mA), it triggers an OWD alarm. This safety feature prevents the control system from interpreting a cut wire as a valid "zero" signal, which could lead to dangerous control actions.
When a Soft Fail like a wire cut occurs, the module sends a special "Not a Number" (NaN) value to the controller. This value instructs the PID algorithms to stop calculating and hold their last safe position rather than winding up or driving valves to dangerous positions based on bad data.
A common scenario involves a working analog signal but missing digital HART data. This often results from low loop impedance. The HART protocol requires a minimum of 250 ohms resistance in the loop to develop its voltage signal. If the loop impedance is too low, the digital signal effectively shorts out. The 4-20mA variable remains correct, but the system reports a communication error.
Understanding these software flags allows for surgical troubleshooting. You can address the specific root cause, whether it is a cut wire or an impedance mismatch, without disrupting the rest of the process.
Proactive maintenance and a clear grasp of diagnostic codes serve as the primary defenses against unplanned downtime. Correctly interpreting LED patterns, managing IOTA configurations, and distinguishing between field power and module faults allows you to extend the operational life of your control hardware. The CC-PAIH01 51405038-175 is a durable component, but it requires specific conditions to function correctly. Respecting the architectural constraints of the Series C platform ensures that your data remains accurate and your plant remains safe.
No. The module supports differential voltage inputs exclusively on Channels 13 through 16. Channels 1-12 are engineered strictly for current inputs. Connecting a voltage transmitter to these channels without external signal conditioning is not supported and requires the specific jumper modification available only on the last four channels.
A fast-blinking red LED signifies a Loop Integrity Failure. This typically means the module detects an open circuit in the field wiring or that the loop resistance is too high (>700Ω) for the module to drive. It points to an external wiring problem rather than a failed module.
This error indicates a loss of voltage at the field terminals, usually caused by a blown fuse on the Input Output Termination Assembly (IOTA). Locate and replace the glass fuse on the IOTA board associated with the field power. The error will clear automatically once voltage is restored.
No. You cannot mix different module generations in a redundant pair. The firmware and hardware architectures differ, and the system will report a "Partner Type Mismatch." Both modules in a redundant pair must be identical part numbers to synchronize and function correctly.


Copyright Notice © 2026 mooreautomated.com All rights reserved,Moore Automated is not an authorized distributor or representative of the manufacturers featured on this website. Brand names and trademarks featured are the property of their respective owners.

Leave Your Comment